How to Recover RAID Arrays using Magic RAID Recovery

Recovering RAID Arrays Step by Step
Corrupted RAID arrays, formatted file systems, deleted files, faulty RAID controllers, exotic file systems and types of RAID are not a problem for Magic RAID Recovery.
There might be several recovery options available depending on whether you have the full set of disks, an incomplete or corrupted array, or a RAID array that cannot be recognized.
Recovering Data from a Healthy RAID Array
Choose this mode if the RAID array you are about to recover is healthy and complete (all the disks comprising the array are available and working correctly). In this mode, you will be able to read files and folders from existing logical volumes, repair corrupted or restore accidentally deleted logical volumes, or repair corrupted file systems.
In addition, you will be able to scan the storage pool for missing partitions or perform a deep scan of the storage pool to find and recover the files and folders.
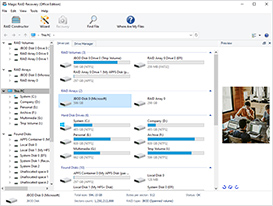
When in this mode, Magic RAID Recovery will automatically scan your computer’s hardware to detect hard drives connected to your computer’s SATA ports (recommended) or attached in a compatible DAS unit. If a healthy RAID array is detected, Magic RAID Recovery will automatically re-create the storage pool by applying the correct configuration parameters such as the disk order and stripe size. Once the storage pool is reassembled, Magic RAID Recovery will detect its GPT or MBR structure and list the available logical volumes.
All you need to do is double-click on the logical volume and specify the type of the analysis. Two types are available: the quick scan for recovering existing data and recently deleted files, and full analysis if the file system is damaged or the file system structures are corrupted, formatted or overwritten.
Launch the analysis to scan the storage volume.
The tool will scan the selected volume and display the files and folders. You can now copy the files and folders or perform a deep scan to locate and recover deleted files by saving them onto a different storage media.
Recovering Missing Logical Volumes
If Magic RAID Recovery detects that one or more logical volumes are missing, the tool will prompt to scan the storage pool for deleted partitions.
Alternatively, you may choose to scan the entire storage pool by choosing the “Full analysis” option. In this mode, Magic RAID Recovery will perform a deep analysis of the storage pool in an attempt to reconstruct the file system complete with all files and folders. You may then copy the files and folders to a different storage media.
Recovering Degraded and Corrupted RAID Arrays, Failed Disks
In this mode, you’ll be dealing with a parity-based RAID array that is missing one or more disks due to hardware failure, or an array that has entered the degraded state. In addition, you will use this mode if you have experienced a failure of the RAID controller.
Connect all disks that are still working to your computer. The direct connection to available SATA ports is recommended, although you may use a compatible multi-disk DAS enclosure connected over a USB or Thunderbolt port.
Launch Magic RAID Recovery. The tool will automatically scan your computer for connected disks and read the available service information. Based on that information, Magic RAID Recovery will attempt to detect the model and manufacturer of the RAID controller, and determine the essential parameters of the RAID array (disk order, stripe size and so on).
The tool attempts to automatically reconstruct the storage pool. The storage pool is displayed as a disk drive.
Magic RAID Recovery will scan the storage pool for available logical volumes.
The discovered logical volumes are listed. Click on a logical volume to open.
Severely Damaged Arrays, Unknown Configurations and Advanced Recovery Options
In certain cases, a RAID array cannot be automatically detected or may have been damaged beyond repair. If this is the case, you have an option for advanced manual recovery. In this mode, you can manually select the hard drives comprising the array, specify disk order and the type of the array. Should you miss some configuration parameters, Magic RAID Recovery will attempt to detect them automatically.
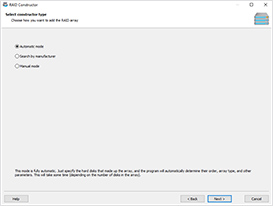
Launch advanced manual mode by using the RAID Constructor button on the top left side of the main window. The RAID Constructor will scan the disks and offer multiple possible options for reconstructing the array.
Automatic mode
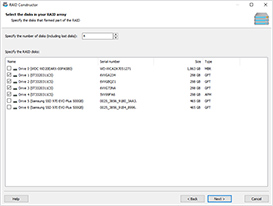
In Automatic mode, specify the number of disks comprising the RAID array and select the disks that used to be parts of the array. Make sure to include all the disks that participated in the array, including corrupted and damaged drives.
The tool will automatically detect all RAID arrays that were ever created on the selected disks. This may be useful if you accidentally reconfigured the array but managed to quickly stop the synchronization process to prevent data loss.
Faster Search by Manufacturer
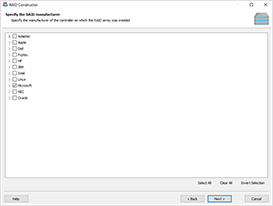
If you know who made the controller of your RAID array, you can use the faster Search by manufacturer option. Note that many types of RAID are software-based; in particular, most commercial NAS units such as Synology, QNAP, ASUSTOR etc., are using ‘mdadm’ to manage multi-disk arrays.
In addition, you may specify the type of the array, which will also speed up the discovery.
Advanced Manual RAID Recovery
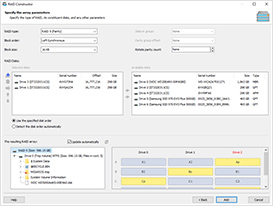
Should the automatic mode fail, the Manual mode might be your last resort. In this mode, you can specify some or all the parameters of the disk array. You can fill in the configuration parameters, and Magic RAID Recovery will dynamically display the logical volumes that are detected as a result of applying the configured settings.
You don’t have to know all the little details about your multi-disk array. After specifying the main parameters, you can leave the rest for automatic detection by selecting the “Detect automatically” option from the list. Click Next to have the tool detect these parameters on the next step.
Automatically Detected RAID Arrays
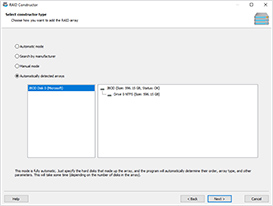
The Automatically detected arrays option will only appear if the tool was able to automatically discover one or more multi-disk arrays.
Select this option and click Next to continue. You will be transferred to the next step with all detected RAID parameters already pre-filled where you will be able to modify any automatically detected parameters.
Reconstructed Multi-Volume RAID
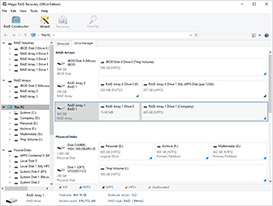
Once you click the Add button, the reconstructed multi-volume array will be added to the RAID Arrays section. You will then be able to select the newly added array just like you would a physical disk.
In addition, the tool will automatically display the discovered logical volumes, which will be added to the RAID Volumes section. You will be able to scan, analyze, or copy data from these volumes just like you would from an ordinary drive letter.
Step-by-Step Recovery Wizard
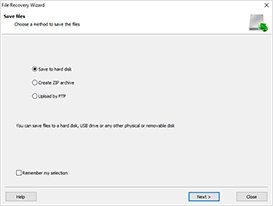
Once the RAID array is added, double-click on the array to select the analysis type. Once you do that, the tool will scan and analyze the array, and list the discovered files and folders. Select the files and folders to recover, and click the Recovery button to launch the recovery wizard. The step-by-step recovery wizard is launched.
Select the location to save the recovered data to. Make sure to select a different physical media to avoid accidentally overwriting information being recovered.
Help
Useful Articles
