Restoration “step by step”
To restore lost files follow these simple instructions.

Step 1: Select the required disk
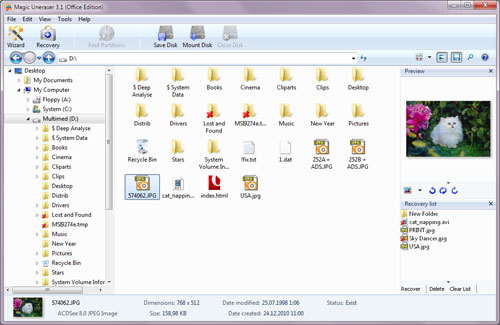
On the left side of the program choose the disk which contains the deleted files. Magic Uneraser starts analysing the selected disk and will display its contents. This procedure takes several seconds.
Step 2: Find deleted file
After analysis is complete, the program will display a list of folders located on the selected disk. Select a folder on the left, after which you can view its contents in the main part of the program. In addition to existing files and folders, you can also view deleted ones. They will be flagged with a special red dagger. You can use the “Find File” option to find the file you need. For your convenience, use the “Filter” option (“View” – “Filter”) in order to see only deleted files and hide existing ones. Use the main part of the program to view, select and recover files and folders. If the “Preview” option is active, then after selecting a file you will be immediately able to view its contents in the upper-right portion of the program.
Step 3: Restore necessary file
In the main area select the files and folders you wish to recover and click “Recovery” in the toolbar. The Save Wizard will open. Here you can select the method you wish to use to save files and other necessary options.
Read more about the Save Wizard…
Content