How to Upgrade Windows 10 from 32-bit to 64-bit Without Losing Data
- Published: July 25, 2018
- Updated: March 21, 2022
If you update the 32-bit version of Windows 7 or 8 (8.1) to Windows 10, you’ll get the 32-bit version of the new OS in the end. Some devices come with a 32-bit operating system preinstalled, though their processors support Windows 10 64-bit as well. Therefore, you can change to this OS. It will be very well-timed, especially if you have already installed more system memory for your computer. In this article, we will tell you how to change Windows 10 32-bit into its 64-bit version.

Why You Should Change Windows from 32-bit to 64-bit
Let’s start with the advantages brought to you by 64-bit Windows. Software optimized for 64-bit operating systems works faster than similar apps for processors that only deal with 32 bits (i.e., 4 bytes) per cycle. Moreover, 32-bit versions of Windows can use no more than 4 GB of system memory, and even so, not all that size is available for programs you may want to run. Increased performance is another big bonus. A computer with 64-bit Windows will handle twice more data simultaneously than its counterpart with the humble 32-bit OS.
So, what are the requirements for your device to be able to upgrade 32-bit Windows to 64-bit? The only feature that might hold you back is the parity of your processor. You’ll be able to change Windows from 32-bit to 64-bit only if you have an x64-based processing unit.
Installing Windows 10 x64 instead of its 32-bit version
If your computer has 32-bit versions of Windows 7 or 8.1, and you update the operating system to Windows 10, Microsoft will automatically provide you with a 32-bit version of the new OS. However, if your hardware supports 64-bit operating systems, you can move to a 64-bit Windows for free.
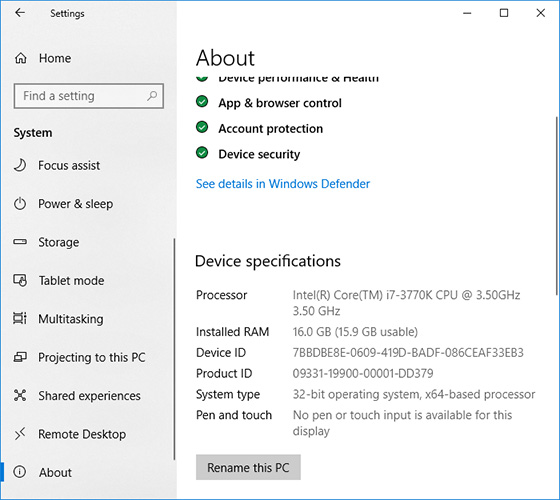
The first step is to make sure that your processor supports 64-bit systems. To do it, open Settings > System > About. In the right pane, find System type.

You can see one of the following lines there:
1. 64-bit operating system, x64-based processor.
Your processor supports 64-bit versions, and you have a 64-bit version of Windows installed.
2. 32-bit operating system, x86-based processor.
Your processor doesn’t support 64-bit versions, and you have a 32-bit version of Windows installed.
3. 32-bit operating system, x64-based processor.
Your processor supports 64-bit systems.
6 Steps to Upgrade 32-bit Windows to 64-bit

Step 1. Check if Your Processor Supports the Upgrade
The first step you should take to upgrade 32-bit to 64-bit on Windows 10 is to make sure it is actually possible. If you see the line “32-bit operating system, x64-based processor” – you’re lucky. It means you are using Windows 10 32-bit, but your CPU can handle a 64-bit version as well.
Attention: if you have a laptop or tablet PC, make sure there are drivers for 64-bit Windows on the manufacturer’s website (if driver bitness is not specified, it usually means both versions are supported).
Step 2. Backup the Important Data
If you want to upgrade Windows 10 from 32-bit to 64-bit without losing data, you should make sure that any important information you have on your drive (namely, the partition you’re going to install the system on) is safe.
There are multiple roads you can take to secure the information. For example, you can store it in the cloud, copy it to an external hard, flash, or solid-state drive. You can even use the Windows Disk Management tool to do this.
Step 3. Prepare the Installation Drive
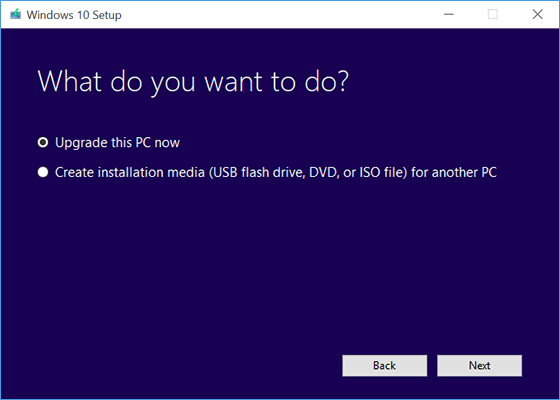
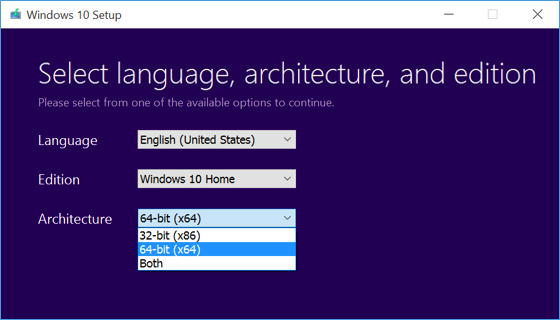
The next step in the process of how to change 32-bit to 64-bit Windows 10 is to download an original ISO image of Windows 10 x64 from the Microsoft website and create a bootable USB drive (disk). You can also create such a Windows 10 x64 bootable drive following the official procedure, that is, using the Media Creation Tool.

Step 4. Installation Start
Now we got to the meat of how to upgrade Windows 10 from 32-bit to 64-bit process. Start installation operation by inserting the boot USB drive. Then, restart your PC. During the loading screen, press Del or F12 (depending on your device) to enter BIOS. In the BIOS menu, adjust the boot priority so that the boot from USB is in the first place. Save and reload to start the installation process.
Step 5. Follow the Installation Instruction
In the answer to the question “How to change from 32-bit to 64”, this is the simple stage. Just follow the instructions on the screen and select the characteristics you want your operating system to have.
You don’t need to enter the product key during the installation. If there is any important data in disk C (or any other partition you’re installing your system on) and there is enough space for the system files, you can choose not to format it to save the information.

Step 6. Finish the Installation Process
The answer to the question of how to convert 32-bit to 64-bit system is not complete if you do not install the 64-bit compatible system drivers. While some of them will be installed automatically by the system, some will have to be downloaded from an official website of a respective hardware provider.

Consider Magicuneraser Software to Recover Any Kind of Data and Types of Files
Even if you lost some important files learning how to change from 32-bit to 64-bit OS, you don’t need to worry. You can restore the deleted data easily with Magic Data Recovery Software. It’s an all-purpose recovery tool, and it’s easy to use. The utility will recover any file of any type within minutes. The interface is user-friendly and looks similar to Windows-integrated Explorer. It has a built-in step-by-step wizard to make the recovery process as easy as possible. In the fast scan mode, the program finds deleted files in a few seconds and offers you the wonderful opportunity to recover your lost data almost instantly.
Furthermore, if the disk gets damaged during the installation process, you might want to check another tool we provide for recovery. Namely, we talk about the partition repair tool that will assist you in checking the health of your drive and solving any errors that might occur.
Like This Article?
FAQ
-
The 64-bit system allows processing software faster. Furthermore, it makes full use of your RAM (the 32-bit version is limited to 4 GB at a time).
-
Prepare a boot USB drive, change the boot priority in BIOS, launch the system from the boot USB and follow the installation instructions to upgrade the system to the 64-bit version.
-
The system can only be upgraded if your PC is equipped with an x64-based processor. You can check the type of processor you have on the Device Specifications screen of your Windows system.
Stay Tuned


Comments
Awesome post! Keep up the great work! :)